Printing for Christmas is more than decoration, it’s about little moments: a handmade ornament, a thoughtful gift, or something special for the season. Part 1 of a few because I know that most of us are looking for Christmas themed prints this time of year. If you celebrate a different holiday, let me know and I’ll test out some prints for you.
This week, I picked five festive prints that are fun and perfect for Christmas. I’ve already printed them, and they came out even better than I expected. There are some niggly parts that need to be glued, but it’s worth the extra effort. Using a 0.2mm nozzle will increase the print quality, but dramatically increase the print time.
A question that often comes up in 3D printing groups is what glue do you use? It’s not always a simple answer because it depends on the application and how/where the print will be used. However, for all the prints listed below, I used Elmer's Liquid School Glue Clear.

Fairy house for Christmas village (with Lights!)

Tips:
Print each layer at ~0.26 mm for balance between speed and detail.
Lower your PETG temperature by ~5 °C to reduce stringing.
Use ~40% fan for the middle and top sections to maintain clean edges while ensuring layer bonding.
Print time: 10 hours using 0.4mm nozzle on 0.20mm Standard
Parts: (non-affiliated links, these are just what I used)
LED Light (Optional but highly recommended) AliExpress, Amazon, Bambu Labs

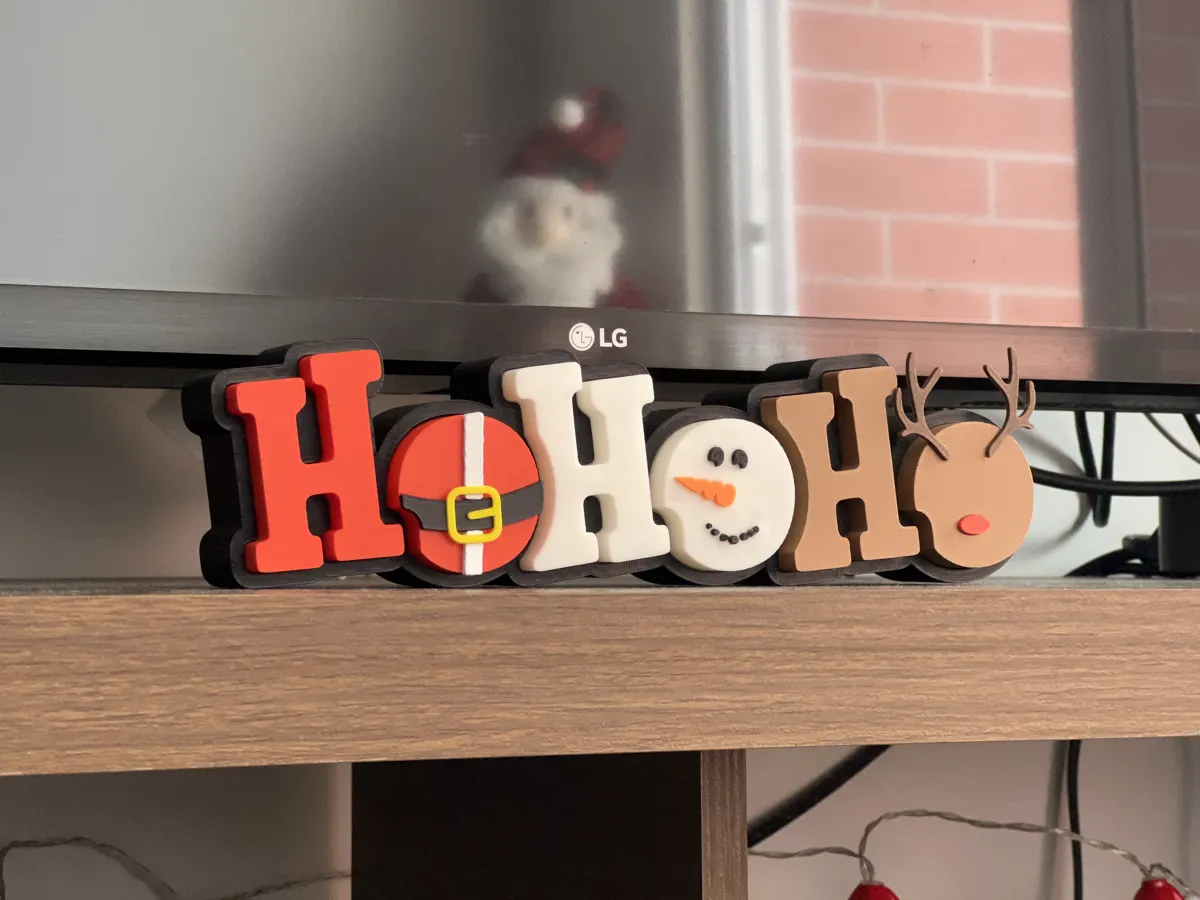
Ho ho ho all the way!
Tips:
What I would recommend is using tweezers to hold the item, dab a little glue on the back and then place it as closely as you can. However, because the glue I recommended dries clear, it doesn’t matter if you have to wiggle it around to get it into place because it doesn’t show up on the print itself in an overly obvious way. Sure if you take a really close look you may find the imperfections. In which case if it bothers you, clean that with cotton earbuds (or even a toothpick) before it finishes drying.
For the reindeer antlers, I dabbed a little glue on them, put them into place and then used the other “o” to prop it up (because they’re the same height, you can just rest it)
Print time: 6 hours using 0.4mm nozzle on 0.20mm Standard
Parts: (non-affiliated links, these are just what I used)

Other than some terrible moulding from the contractors, 0 notes, it looks great!!!

Tips:
I used the 7 colour changes profile to reduce the waste of filament given this is an AMS model, it’s the second one available under “print profiles”.
Print time: 2 hours using 0.4mm nozzle on 0.20mm Standard
Parts: (non-affiliated links, these are just what I used)


Tips:
This is such a cute and friendly Grinch to add to the holiday décor that everyone will love (especially if you’re like me and it’s on my Christmas time movie watch list). The print is a little small for my liking so I upscaled it to 200%. This made it around 50cm tall. This may or may not be too big or too small for you. I won’t lie, this model has a lot of supports, and at 200% at least, needs quite a bit of filament. The supports aren’t the easiest to remove but just take your time. I recommend one of these kits to make it easier. You will need to glue some parts together. It’s worth the effort!
I printed the “fuzzy skin” profile variant.
Print time: 9 hours using 0.4mm nozzle on 0.20mm Standard
Parts: (non-affiliated links, these are just what I used)

Matte Black hats would have been awesome! If you have matte black, use that.

Tips:
Even though this model does not require gluing, I would copy and paste a couple more onto the build plate in case some go missing or if they don’t print smoothly. There’s holes for each of the buttons/nose but sometimes 3D prints aren’t that clean and it would make it hard to clip in. Also make sure they’ve completely dried before taking them off the plate so that they hold their shape. I found some of the pieces, like the nose, needs a little bit of clean up. If I reprinted it, I may do just those with a .2mm nozzle instead.
Print time: 3 hours using 0.4mm nozzle on 0.20mm Standard
Parts: (non-affiliated links, these are just what I used)
Thanks for hanging out with me for another week of “I’d Print That”!
If you enjoyed this issue, consider subscribing or sharing it with a friend who also has a printer glued to their desk.
The more makers we gather, the more cool prints we can all discover together.
👉 Want to support the newsletter? Hit subscribe, share a link, or reply and tell me what you printed this week! Follow us on Instagram at IdPrintThat3D.
Remember that if you’re intending on printing any of these to sell to please reach out to the original creators for licensing. I think they’d make great prints to sell but do the right thing and support their creators.